
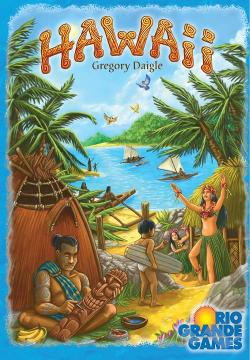
2011 · 領土構築
Hawaii
プレイヤーは族長となり、5ラウンドにわたって海辺の村を発展させ、近くの島々を探検します。 モジュラーボード上を移動しながら、新しい村タイルを購入したり、旅費をまかなうために3種類の通貨を使い分けたり、集落を成長させたりします。ゲームが進むにつれて収入が減っていくため、民を喜ばせる短期的な買い物と、得点につながる長期的なタイル配置や島の探検とのバランスが重要です。 資源管理、村タイルの空間的な配置、そしてアクションのタイミングが重視されます。最良の取引を手に入れるため、相手を出し抜きましょう。
- プレイ人数
- 2–5 ベスト3人
- プレイ時間
- 60分
- 対象年齢
- 13+
- 複雑さ
- 2.9 / 5
ゲームについて
- デザイン


Ludoyaのテーブルでは
Ludoyaで詳しい統計を見る- 38
- 記録されたプレイ
- 54
- プレイヤー
- 1h 32m
- 平均プレイ時間
- 17
- コレクション登録
- 3
- ウィッシュリスト登録
6.4/10
Ludoyaのレビュー16件より
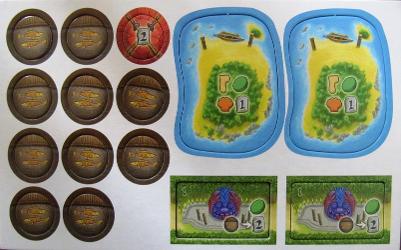
Evan6.0 At the start of each round, action tokens are distributed from a bag to the spaces in the action areas. Each token has a number representing the cost of that action in shell tokens. This process is a little fiddly, since first you fill some spaces, then come back and start from the top filling the rest so long as a math equation comparing the sums of tokens lines up. It's mildly annoying to have to start each round this way. Then players in turn order can spend feet tokens to walk their action pawn to a space with an action token. Claim that token, pay the cost, and resolve the action. The cost is one foot per tile. They can also pay twice as much as the cost token to gain an extra effect. Claimed tokens go in front of you, and at the end of the round there's a check to see if players picked up enough tokens so the sum at least hits the stated amount on the round indicator, and then there's a majority scoring for who got the highest sum of tokens. The intent being that there's some tension between wanting to spend double for the extra effect, but then that will hurt your end of round majority chances. Really though, the game is restrictive to the point of feeling a little dull. To make the end of round scoring you are pressured to overspend. Action tokens are very limited, with randomly determined boom and bust rounds depending on what price ends ups where and how many tokens make it into any given space. Most of the actions get you a tile to add to your board. Generally, the two paths through the game are to go for lots of tiles in the same row or trying to get something to score in all your rows to hit the maximum bonus threshold. It's fine, but feels needlessly limited in the face of similar games like Yokohama. ★ Art, Iconography and components functional ★ Clever or interesting mechanisms ★ Reasonably low downtime between turns with mildly AP players ★ Multiple plays stay interesting ★ Low or mitigatable luck elements ★★☆☆☆ Raw enjoyment
4回プレイ済み
ルールに関する質問
Ludoyaのルールアシスタントがルールブックに基づいて回答しています。
族長が移動するたびに移動コストを支払う必要がありますか?そのコストは何で支払いますか?
はい — 酋長を移動させるときは、移動ルールと例(5〜6ページ参照)にあるとおり、移動用の通貨(足/貝殻)を使って、印刷されている移動コストを支払います。
場所タイルを買うときは、印刷されている価格と価格トークンのどちらを支払うの?タイルはどこに置けばいい?
その場所に表示されている現在の価格を支払い(価格トークンと印刷された数字のどちらを使うかはルールに従ってください)、購入した場所タイルを購入・配置の項(4、6~7ページ参照)の配置ルールに従って置きます。
Fishing CoveとIsland Dockはどういう仕組みですか?魚を取るには足を支払う必要がありますか?それと、ボートはどう関係しますか?
漁場と島の桟橋への訪問には、それぞれ専用のルールがあります。説明に従って魚を獲ったり、ボートの効果を使ったりし、指示があれば必要な足を支払います。ボートの使用、得点計算、島の山札の扱いについては例とともに説明されています(8ページ参照)。
プレイヤー順トラックに族長を置くのはなぜですか?それによってラウンド終了時の得点計算はどう変わりますか?
酋長を順番トラックに配置すると、手番順が決まり、ラウンド終了時の得点計算に使う位置も決まります。ルールブックには配置手順と得点例が載っているので、ラウンド終了時の同点処理や得点計算を正しく行えます(9ページ参照)。
ラウンドの合間には何が起こるの?資源は補充されて、場所タイルや島はどうリセットされるの?
ラウンドの準備では、貝殻/足/果物を配り、場所タイルを補充し、ラウンド表示マーカーを交換し、トークンと島をリセットしてから、ラウンド準備の手順(10ページ参照)に従って次のラウンドを始めます。





ゲーム情報(人数、プレイ時間、対象年齢、クレジット)の出典:BoardGameGeek。